Accessing your Internet of Things (IoT) devices when they're tucked away behind your home or office router can often feel like a digital puzzle, especially when your central hub is a versatile Raspberry Pi. This comprehensive guide will demystify the complexities of remote IoT access, providing you with practical, secure solutions to connect with your Raspberry Pi-powered projects from anywhere in the world. We'll explore various methods, from the straightforward to the highly secure, ensuring your smart home, monitoring system, or custom automation is always within reach, without compromising your network's integrity.
In today's interconnected world, the ability to monitor and control devices remotely is not just a luxury but often a necessity. Whether you're checking sensor readings from your garden, adjusting your smart thermostat, or managing a custom automation script running on your Raspberry Pi, reliable and secure remote access is paramount. This article will walk you through the essential steps and considerations for achieving seamless remote IoT functionality, focusing on best practices to keep your data and devices safe from prying eyes.
Table of Contents
- Understanding the Remote IoT Challenge
- The Raspberry Pi as Your IoT Hub
- Traditional Methods: Port Forwarding & Its Pitfalls
- Secure Remote Access Solutions for Remote IoT
- VPN: Your Private Tunnel for Remote IoT
- Reverse Proxy with Nginx for Web Services
- Cloud-Based IoT Platforms & MQTT Brokers
- Best Practices for Securing Your Remote IoT Setup
- Conclusion
Understanding the Remote IoT Challenge
At the heart of every home or small office network lies a router, acting as a gatekeeper between your local network and the vast expanse of the internet. This router typically employs Network Address Translation (NAT), a clever mechanism that allows multiple devices on your private network to share a single public IP address provided by your Internet Service Provider (ISP). While NAT is excellent for conserving IP addresses and providing a basic layer of security by hiding your internal network structure, it creates a significant hurdle for remote access. Your Raspberry Pi, like your laptop or smartphone, receives a private IP address (e.g., 192.168.1.100) that is only visible within your local network. When you're outside your home, trying to connect to this private IP address directly is akin to trying to call a house phone number without knowing the area code – the call simply won't get through. The router, by default, blocks unsolicited incoming connections to devices on your internal network. This is why accessing your **remote IoT behind router example in Raspberry Pi** requires specific configurations to bypass this barrier, ensuring that only legitimate traffic reaches your devices. The challenge intensifies when you consider the dynamic nature of public IP addresses. Most residential ISPs assign dynamic IP addresses, meaning your public IP can change periodically. This makes it difficult to consistently connect to your network from outside, as the address you used yesterday might not be the same today. Addressing these fundamental networking concepts is the first step towards building a robust and reliable remote IoT solution.The Raspberry Pi as Your IoT Hub
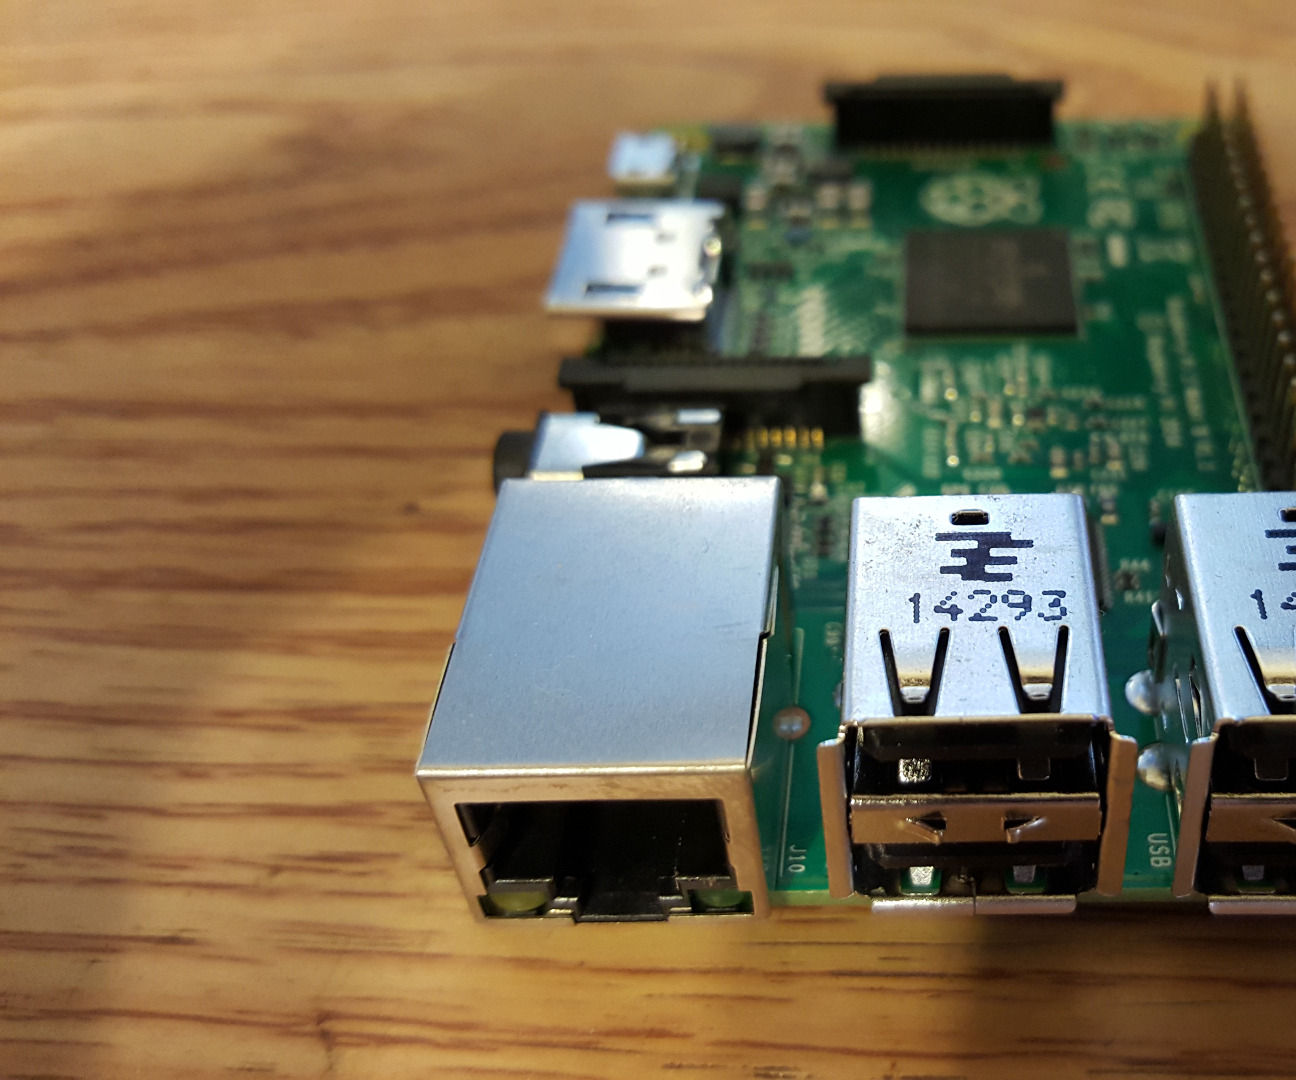
The Raspberry Pi has emerged as an undisputed champion in the realm of IoT development. Its compact size, low power consumption, affordability, and incredible versatility make it an ideal candidate for a wide array of projects, from simple sensor monitoring to complex home automation systems. Running a full Linux operating system, the Raspberry Pi offers unparalleled flexibility, allowing developers to install a vast array of software, libraries, and programming languages. For a **remote IoT behind router example in Raspberry Pi**, its capabilities are particularly beneficial. You can connect various sensors (temperature, humidity, motion), actuators (relays, motors), and cameras directly to its GPIO pins or via USB. It can serve as a central data logger, a local web server for dashboards, or a gateway for other low-power IoT devices. Its ability to run services like MQTT brokers, VPN servers, or even lightweight web servers like Nginx makes it a powerful, all-in-one solution for managing your IoT ecosystem. The low cost of entry also means that experimenting with different remote access methods doesn't break the bank, encouraging hands-on learning and practical application.Traditional Methods: Port Forwarding & Its Pitfalls
When first considering how to enable **remote IoT behind router example in Raspberry Pi**, port forwarding is often the first method that comes to mind. It's a common technique, relatively simple to set up, but it comes with significant security implications that must be thoroughly understood before implementation.How Port Forwarding Works
Port forwarding, also known as port mapping, is a rule configured on your router that tells it to direct incoming traffic on a specific public port to a specific private IP address and port on your local network. For instance, if your Raspberry Pi is running a web server on port 80 (its private IP is 192.168.1.100), you could configure your router to forward all incoming traffic on public port 8080 to 192.168.1.100:80. When you then type your public IP address followed by :8080 into a web browser from outside your network, your router intercepts this request and directs it to your Raspberry Pi. The steps generally involve:- Assigning a static private IP address to your Raspberry Pi (to ensure its internal IP doesn't change).
- Accessing your router's administration interface (usually via a web browser at an address like 192.168.1.1 or 192.168.0.1).
- Navigating to the "Port Forwarding" or "NAT" section.
- Creating a new rule specifying:
- The external (public) port or port range.
- The internal (private) IP address of your Raspberry Pi.
- The internal (private) port or port range on the Raspberry Pi.
- The protocol (TCP, UDP, or both).
- Saving the rule.
Security Risks and Vulnerabilities
While port forwarding offers direct access, it inherently exposes your internal devices directly to the internet. This is a significant security concern and is generally not recommended for sensitive applications or for users without extensive cybersecurity knowledge. The moment you open a port, you are essentially creating a direct pathway for anyone on the internet to potentially access that service. Consider these risks:- Increased Attack Surface: Every open port is a potential entry point for malicious actors. If the service running on your Raspberry Pi (e.g., a web server, SSH) has a vulnerability, it can be exploited directly from the internet.
- Brute-Force Attacks: Services like SSH (Secure Shell) are often targeted by automated bots attempting to guess passwords. If your Raspberry Pi uses weak credentials, it could be compromised.
- Exploitation of Software Vulnerabilities: Outdated software or unpatched operating systems on your Raspberry Pi could have known vulnerabilities that attackers can exploit to gain unauthorized access, inject malware, or steal data.
- Lack of Granular Control: Port forwarding typically grants full access to the specified service. It doesn't offer fine-grained control over who can access it or from where, making it difficult to restrict access to trusted users or IP addresses.
- Privacy Concerns: Depending on the data your IoT devices collect, direct exposure could lead to privacy breaches if the data stream is intercepted or the device itself is compromised.
Secure Remote Access Solutions for Remote IoT
Given the inherent risks of direct port forwarding, it's crucial to explore more secure and robust alternatives for accessing your **remote IoT behind router example in Raspberry Pi**. These methods prioritize data encryption, authentication, and controlled access, significantly reducing your exposure to cyber threats. The most obvious choice for giving secure remote access is to create a secure tunnel or use managed services that handle the complexities for you. We'll delve into Virtual Private Networks (VPNs), reverse proxies, and cloud-based IoT platforms, each offering distinct advantages for different use cases. Remember to monitor your network's health and seek expert advice if you're unsure about any configuration.VPN: Your Private Tunnel for Remote IoT
A Virtual Private Network (VPN) creates an encrypted tunnel between your remote device (e.g., your laptop or smartphone) and your home network. Once connected to the VPN, your remote device effectively becomes part of your home network, allowing you to access your Raspberry Pi and other devices as if you were physically present in your home. This is arguably one of the most secure and versatile methods for **remote IoT behind router example in Raspberry Pi** access. The primary benefits of using a VPN include:- Encryption: All traffic passing through the VPN tunnel is encrypted, protecting your data from eavesdropping.
- Network Extension: You gain full access to your entire home network, not just a single device or service. This means you can SSH into your Raspberry Pi, access its web interface, or even connect to other devices like network-attached storage (NAS).
- NAT Traversal: The VPN server, typically running on your Raspberry Pi or router, handles the incoming connection, effectively bypassing the NAT limitations for all internal traffic once the tunnel is established.
- Authentication: VPNs require strong authentication (certificates, usernames/passwords), ensuring only authorized users can connect.
Setting Up OpenVPN on Raspberry Pi
OpenVPN is a popular open-source VPN solution that is well-suited for a Raspberry Pi. Setting it up involves a few key steps:- Prerequisites:
- A Raspberry Pi with a fresh installation of Raspberry Pi OS (formerly Raspbian).
- A static private IP address for your Raspberry Pi.
- Port forwarding configured on your router for the OpenVPN port (default UDP 1194) to your Raspberry Pi's static IP. This is the *only* port you need to forward, significantly reducing your attack surface compared to forwarding multiple service ports.
- A Dynamic DNS (DDNS) service if your public IP is dynamic.
- Installation:
You can use a convenient script like PiVPN, which automates much of the OpenVPN server setup on your Raspberry Pi. This script simplifies certificate generation, user management, and configuration. To install PiVPN, simply run:
curl -L https://install.pivpn.io | bashFollow the on-screen prompts, which will guide you through choosing OpenVPN, selecting the VPN port, and setting up the server.
- Client Configuration:
Once the server is set up, you'll need to generate client configuration files for each device you want to connect from. PiVPN makes this easy:
pivpn addThis command generates a .ovpn file. You then transfer this file to your client device (laptop, smartphone) and import it into an OpenVPN client application (available for Windows, macOS, Linux, Android, iOS).
Reverse Proxy with Nginx for Web Services
A reverse proxy acts as an intermediary between the internet and your web-based services running on your Raspberry Pi (or other devices). Instead of directly exposing your Raspberry Pi's web server, you expose the reverse proxy server, which then forwards requests to the appropriate internal service. Nginx is a popular, high-performance web server that can also function as an excellent reverse proxy. For a **remote IoT behind router example in Raspberry Pi** where you have multiple web interfaces (e.g., Node-RED, Home Assistant, a custom Python Flask app), a reverse proxy offers several advantages:- Single Public IP: You only need to forward ports 80 (HTTP) and 443 (HTTPS) to your Raspberry Pi running Nginx. Nginx then handles routing requests to different internal services based on the domain name or URL path.
- SSL Termination: Nginx can handle SSL/TLS encryption for all incoming connections, meaning your internal services don't need to manage certificates. This simplifies security and ensures all external communication is encrypted.
- Load Balancing: For more advanced setups, Nginx can distribute incoming requests across multiple backend servers, though this is less common for a single Raspberry Pi IoT setup.
- Security Enhancements: Nginx can filter malicious requests, block unwanted IP addresses, and add security headers, acting as a first line of defense.
- Installing Nginx:
sudo apt update && sudo apt install nginx - Configuring Nginx: Edit the default Nginx configuration file (e.g.,
/etc/nginx/sites-available/defaultor create a new one in/etc/nginx/sites-available/and symlink it tosites-enabled). - Add a server block for each service you want to expose, specifying the domain name and the internal IP/port of the service.
- Obtain an SSL certificate (e.g., using Certbot with Let's Encrypt for free, trusted certificates).
- Ensure your router forwards ports 80 and 443 to your Raspberry Pi's static private IP.
- Use a DDNS service to point your chosen domain name to your public IP.
server { listen 80; server_name your_domain.ddns.net; return 301 https://$host$request_uri; } server { listen 443 ssl; server_name your_domain.ddns.net; ssl_certificate /etc/letsencrypt/live/your_domain.ddns.net/fullchain.pem; ssl_certificate_key /etc/letsencrypt/live/your_domain.ddns.net/privkey.pem; location / { proxy_pass http://localhost:8080; # Or http://192.168.1.100:8080 for another device proxy_set_header Host $host; proxy_set_header X-Real-IP $remote_addr; proxy_set_header X-Forwarded-For $proxy_add_x_forwarded_for; proxy_set_header X-Forwarded-Proto $scheme; } }Cloud-Based IoT Platforms & MQTT Brokers
For scalable and highly secure **remote IoT behind router example in Raspberry Pi** deployments, cloud-based IoT platforms offer a powerful alternative. These platforms, such as AWS IoT Core, Google Cloud IoT Core, and Azure IoT Hub, provide managed services that handle device connectivity, security, data ingestion, and integration with other cloud services. The key advantage here is that your Raspberry Pi initiates an *outbound* connection to the cloud broker, effectively bypassing the need for any inbound port forwarding on your router.MQTT for Remote IoT Communication
At the core of many cloud IoT platforms and efficient remote communication is MQTT (Message Queuing Telemetry Transport). MQTT is a lightweight, publish-subscribe messaging protocol designed for constrained devices and low-bandwidth, high-latency networks. It's ideal for IoT applications where devices need to send small amounts of data reliably. How MQTT works:- Broker: A central server (the MQTT broker) manages messages.
- Publishers: IoT devices (like your Raspberry Pi) publish messages to specific "topics" on the broker.
- Subscribers: Other devices or applications subscribe to topics and receive messages published to those topics.
- NAT Traversal Solved: No port forwarding required on your home router.
- Scalability: Cloud platforms can handle millions of devices and massive data volumes.
- Managed Security: Cloud providers offer robust security features, including device authentication, authorization, and data encryption in transit and at rest.
- Integration: Seamless integration with data analytics, storage, machine learning, and other cloud services.
- Reliability: High availability and fault tolerance built into cloud infrastructure.
Best Practices for Securing Your Remote IoT Setup
Regardless of the method you choose for your **remote IoT behind router example in Raspberry Pi**, security should always be your top priority. A compromised IoT device can be a gateway for attackers to access your entire home network, steal data, or even launch attacks on other systems. Remember to provide robust security alongside any remote access solution. Here are essential best practices:- Strong, Unique Passwords: This cannot be stressed enough. Use complex, unique passwords for your Raspberry Pi, router, cloud accounts, and any services you expose. Avoid default credentials at all costs.
- Regular Software Updates: Keep your Raspberry Pi's operating system and all installed software up to date. Updates often include critical security patches that fix vulnerabilities. Regularly run
sudo apt update && sudo apt upgrade. - Least Privilege Principle: Grant only the necessary permissions to users and services. For example, don't run services as the 'root' user unless absolutely required. Create separate, unprivileged user accounts for specific tasks.
- Firewall Rules: Configure your Raspberry Pi's firewall (e.g., UFW - Uncomplicated Firewall) to allow only necessary incoming and outgoing connections. Block all other traffic. For instance, if using SSH, only allow connections from your trusted IP addresses if possible.
- Disable Unused Services: If you're not using a particular service (e.g., Bluetooth, VNC, specific web servers), disable or uninstall it to reduce your attack surface.
- SSH Key-Based Authentication: For SSH access, disable password authentication and use SSH keys instead. This is far more secure as it relies on cryptographic keys rather than guessable passwords.
- Two-Factor Authentication (2FA): Enable 2FA wherever possible, especially for cloud accounts and VPNs, to add an extra layer of security.
- Network Segmentation: If possible, create a separate VLAN or guest network for your IoT devices. This limits the potential damage if an IoT device is compromised, preventing attackers from easily moving to your main network.
- Monitor Logs: Regularly check system logs on your Raspberry Pi and router for suspicious activity or failed login attempts.
- Backup Your Data: Regularly back up your Raspberry Pi's SD card or critical configuration files.
Conclusion
Navigating the world of **remote IoT behind router example in Raspberry Pi** can seem daunting initially, but with the right approach, it's entirely achievable and incredibly rewarding. We've explored various methods, from the direct but risky port forwarding to the secure and scalable solutions offered by VPNs, reverse proxies, and cloud-based MQTT brokers. Each method presents a unique balance of complexity, cost, and security, allowing you to choose the best fit for your specific project needs. The most obvious choice for initial remote access might be port forwarding, but as we've seen, this comes with significant caveats regarding security. If your current remote access method is sufficient, great. If not, you may want to add a layer of security like a VPN to ensure it gets more protected. For robust, reliable, and secure access to your Raspberry Pi IoT projects, a VPN offers unparalleled networkRelated Resources:


Detail Author:
- Name : Roosevelt Witting
- Username : kilback.rashawn
- Email : wroob@towne.com
- Birthdate : 1975-02-13
- Address : 52790 Octavia Ports Apt. 588 Emilianoborough, CA 70133-3551
- Phone : 1-984-226-2267
- Company : Jast-Rowe
- Job : Manicurists
- Bio : Quaerat architecto soluta tempora animi sequi omnis. Perferendis mollitia totam a omnis quia neque. Nemo iste placeat et nam dicta nesciunt.
Socials
twitter:
- url : https://twitter.com/cristal.runolfsdottir
- username : cristal.runolfsdottir
- bio : Nisi cupiditate minus molestias laborum. Vel temporibus ullam maiores vel. Incidunt aut impedit sint eaque labore.
- followers : 3446
- following : 1355
instagram:
- url : https://instagram.com/cristal_runolfsdottir
- username : cristal_runolfsdottir
- bio : Commodi eos recusandae et est provident. Velit sit fuga saepe id ut.
- followers : 400
- following : 2064
facebook:
- url : https://facebook.com/cristal_runolfsdottir
- username : cristal_runolfsdottir
- bio : Qui eos rem corporis est quas.
- followers : 764
- following : 2755
tiktok:
- url : https://tiktok.com/@cristal_real
- username : cristal_real
- bio : Voluptas nobis rerum consequatur earum.
- followers : 5422
- following : 1349
