Imagine this: you're away from home, perhaps on vacation or at a friend's house, and suddenly you remember a project running on your Raspberry Pi. Maybe you need to check its status, tweak some code, or even start a new task. The thought of not being able to access it can be frustrating. This is where the power of remote access comes in, transforming your tiny computer into a truly global device.
The Raspberry Pi, that versatile little device, has become a cornerstone for hobbyists, educators, and professionals alike. You can use it to learn about coding, build robots, stream movies, and even play games. Its small footprint and low energy demands make it ideal for remote deployment, and accessing Raspberry Pi from another computer is a common user need. But what if you need to control it from afar? This comprehensive guide will walk you through the essential methods to access your Raspberry Pi remotely, ensuring you can manage your projects, troubleshoot issues, or simply check in on your device from anywhere in the world.
Table of Contents
- The Power of Raspberry Pi: More Than Just a Hobby Board
- Why Access Your Raspberry Pi Remotely?
- Core Methods to Access Pi Remotely
- Advanced Remote Access Solutions
- Setting Up Remote Access: A General Guide
- Security Considerations for Remote Access
- Troubleshooting Common Remote Access Issues
- The Future of Raspberry Pi Remote Access
The Power of Raspberry Pi: More Than Just a Hobby Board
The Raspberry Pi has revolutionized how we interact with computing, offering a compact, affordable, and incredibly versatile platform. Ideal for beginners and experts in robotics, automation, and programming, it's a device that allows you to do quite a lot. From setting up a home automation hub to building a retro gaming console, or even deploying a web server, the possibilities are virtually endless. Its low power consumption makes it perfect for always-on projects, and its robust community support ensures that help is always at hand. Understanding its capabilities is the first step, and unlocking its full potential often involves learning how to access Raspberry Pi remotely.Why Access Your Raspberry Pi Remotely?
Have you ever wanted to access your Raspberry Pi computer from anywhere in the world? The reasons are numerous and compelling. Perhaps you want to work on Pi projects away from home, troubleshoot issues, or simply monitor a sensor array deployed in a remote location. Remote access to a Raspberry Pi from a PC is a powerful and versatile tool that allows users to control their Raspberry Pi from anywhere in the world. Consider these scenarios:- Project Management: You've set up a home automation system or a surveillance camera, and you need to make a quick adjustment while you're at work. Remote access allows you to do this without physically being present.
- Troubleshooting: If your Pi-powered media server suddenly stops working, you can remotely log in to diagnose the problem and potentially fix it without needing to connect a monitor, keyboard, and mouse.
- Learning and Development: For students or developers, having access to your Pi from any computer means you can continue coding or experimenting even when you're not at your desk.
- Server Hosting: If your Pi is hosting a small website or a game server, remote access is essential for maintenance, updates, and monitoring its performance.
- Resource Efficiency: The small footprint and low energy demands of Raspberry Pi make it ideal for remote deployment, and accessing Raspberry Pi from another computer is a common user requirement for these reasons.
Core Methods to Access Pi Remotely
There are several reliable methods to establish a remote connection to your Raspberry Pi. Each method offers different functionalities, from command-line control to a full graphical desktop experience. You can access Raspberry Pi remotely using Raspberry Pi Connect, SSH, or VNC. Let's explore these fundamental approaches.SSH: The Command Line Powerhouse
SSH, or Secure Shell, is arguably the most fundamental and widely used method for remote access to your Raspberry Pi. It's a secure protocol that enables remote access to your Raspberry Pi’s command line, allowing you to control the device, run commands, and transfer files seamlessly. For many, especially those comfortable with the Linux terminal, SSH is the go-to choice due to its simplicity, efficiency, and robust security features. **How it works:** SSH creates an encrypted connection between your local computer and your Raspberry Pi. This means all data exchanged, including your password and commands, is secure from eavesdropping. **Setting it up:** 1. **Enable SSH on your Pi:** On Raspberry Pi OS, you can enable SSH via `raspi-config` (Interface Options -> SSH) or by creating an empty file named `ssh` in the boot partition of your SD card. 2. **Find your Pi's IP address:** Use `hostname -I` on the Pi or check your router's connected devices list. 3. **Connect from your computer:** * **Linux/macOS:** Open a terminal and type `ssh pi@YOUR_PI_IP_ADDRESS` (replace `YOUR_PI_IP_ADDRESS` with your Pi's actual IP). The default username is `pi`. * **Windows:** Use a client like PuTTY or the built-in OpenSSH client in PowerShell/Command Prompt. **Pros:** * **Lightweight:** Uses minimal resources on both the Pi and the client device. * **Secure:** Encrypts all communication. * **Powerful:** Full control over the Pi's operating system via command line. * **Versatile:** Can be used for file transfer (SFTP/SCP) as well. **Cons:** * **No graphical interface:** Requires familiarity with command-line commands. * **Network limitations:** By default, only works on the local network unless port forwarding or a VPN is configured. SSH is the backbone for many advanced remote access setups, making it an indispensable tool for any Raspberry Pi user.VNC Connect: Full Desktop Experience
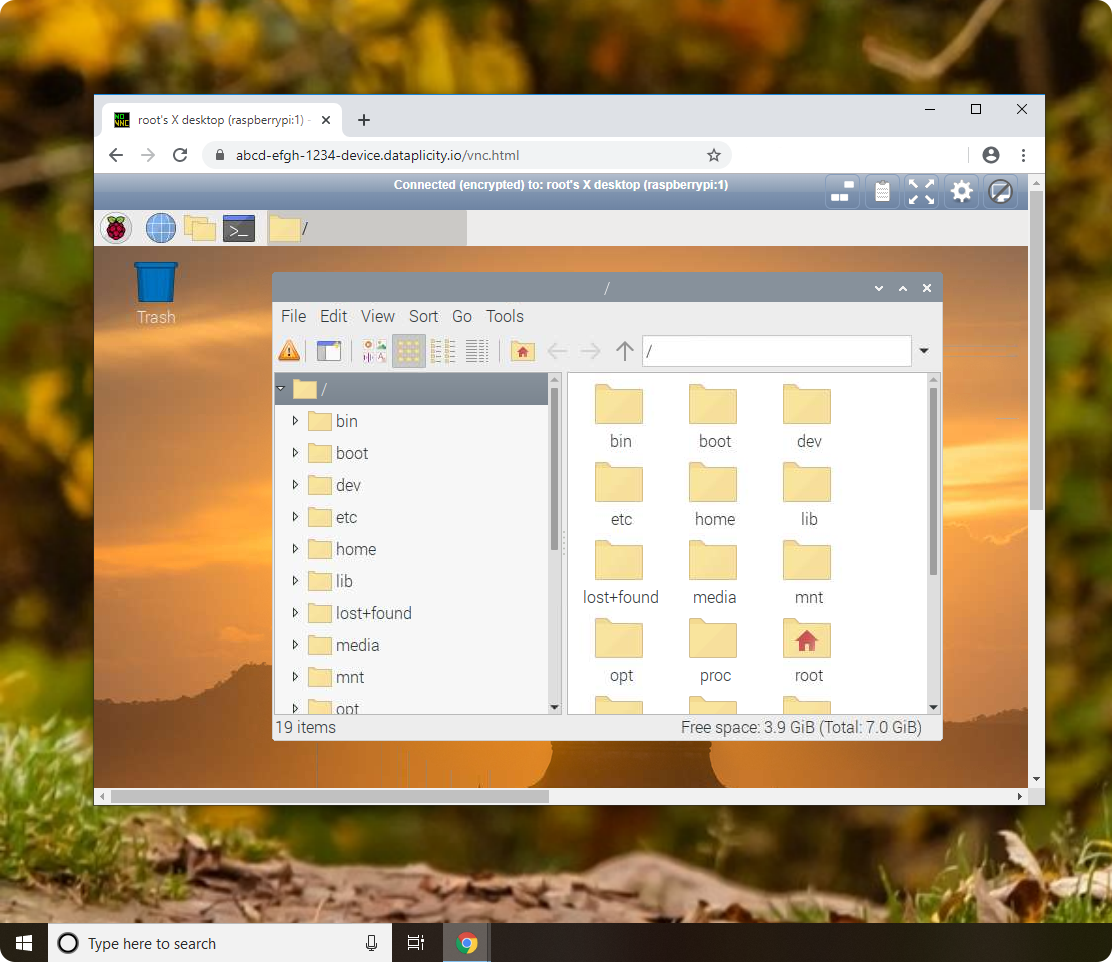
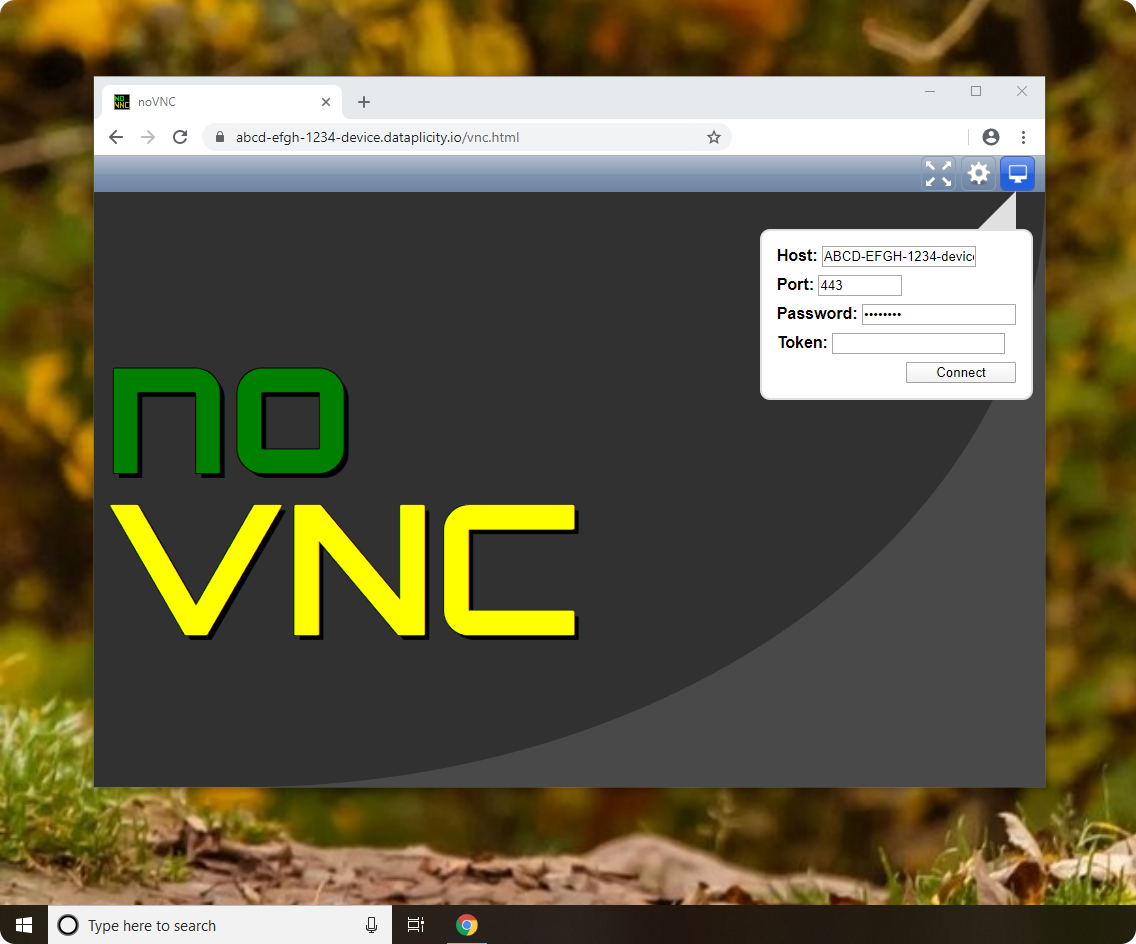
While SSH provides command-line control, sometimes you need to see and interact with your Raspberry Pi's graphical desktop environment. This is where VNC (Virtual Network Computing) comes into play. Remote log into your Raspberry Pi’s full operating system using VNC Connect. VNC has long been the best way to access any computer remotely on the same network, providing a visual interface that mirrors your Pi's desktop onto your local screen. **How it works:** VNC consists of a server component running on your Raspberry Pi and a client viewer on your local computer. The server captures the Pi's screen and sends it to the client, while the client sends keyboard and mouse inputs back to the server. **Setting it up:** 1. **Enable VNC Server on your Pi:** Raspberry Pi OS includes RealVNC Connect server. You can enable it via `raspi-config` (Interface Options -> VNC) or directly from the desktop environment's preferences. 2. **Download VNC Viewer:** Install the appropriate VNC Viewer application on your computer (Windows, macOS, Linux, mobile). 3. **Connect:** Open VNC Viewer, enter your Pi's IP address, and log in with your Pi's username and password. **Pros:** * **Graphical Interface:** Provides a familiar desktop experience, making it easier for visual tasks. * **User-Friendly:** Ideal for beginners who are not comfortable with the command line. * **Full Control:** Access all applications and settings on your Pi's desktop. **Cons:** * **Resource Intensive:** Requires more network bandwidth and Pi resources compared to SSH. * **Performance:** Can be slow over high-latency or low-bandwidth connections. * **Security:** Requires careful configuration to be secure when accessing over the internet (e.g., strong passwords, VPN). Yes, you could already establish a remote connection over VNC, but VNC is mainly for technical support and can be difficult to secure for broader internet access without additional measures.Raspberry Pi Connect: The Official Solution
Raspberry Pi has just announced a new way to remotely access a Raspberry Pi, and it's a significant development. Introducing the beta version of Raspberry Pi Connect, a secure and easy way to access your Raspberry Pi remotely, using just a web browser. This is the first official remote access client for Raspberry Pi, aiming to simplify the process significantly. **How it works:** Raspberry Pi Connect utilizes a web-based interface and a cloud service to establish a secure connection, bypassing many of the traditional networking challenges like port forwarding. It's designed to be user-friendly and robust. **Setting it up:** 1. **Update your Pi:** Ensure your Raspberry Pi OS is up-to-date (`sudo apt update && sudo apt full-upgrade`). 2. **Install Raspberry Pi Connect:** Follow the official instructions, which typically involve installing a package. 3. **Log in:** Access the service via a web browser and log in with your Raspberry Pi ID. Your Pi will then appear in your dashboard. **Pros:** * **Ease of Use:** Designed for simplicity, making it accessible even for beginners. * **Browser-Based:** No need to install dedicated client software on your local machine. * **Official Support:** Developed and maintained by the Raspberry Pi Foundation, ensuring compatibility and reliability. * **Secure by Design:** Aims to handle secure connections automatically, reducing configuration complexity. **Cons:** * **Still in Beta:** As a new service, it might have bugs or limitations during its beta phase. * **Cloud Dependency:** Relies on Raspberry Pi's cloud infrastructure. * **Limited Customization:** May offer less granular control compared to direct SSH or VNC setups for advanced users. Raspberry Pi Connect represents a promising future for effortless remote access, making it easier than ever to unlock the full potential of your Raspberry Pi.Advanced Remote Access Solutions
Beyond the core methods, several advanced tools and services offer enhanced security, flexibility, and performance for accessing your Raspberry Pi remotely, especially when dealing with complex network setups or strict security requirements.Cloudflare Tunnels and Tailscale
For those looking to access their Raspberry Pi from outside their home network without the complexities of port forwarding or static IP addresses, services like Cloudflare Tunnels and Tailscale offer robust solutions. Earlier, I shared how you can use Cloudflare Tunnels to access Raspberry Pi outside your home network. A few readers suggested using Tailscale, and indeed, this is a fantastic alternative. * **Cloudflare Tunnels:** This service creates a secure, outbound-only connection from your Raspberry Pi to Cloudflare's network, effectively exposing your Pi to the internet without opening any inbound ports on your router. It's excellent for hosting web services or SSH access securely. * **Tailscale:** A zero-config VPN that creates a secure mesh network between your devices, regardless of their location. It's built on WireGuard and makes it incredibly easy to connect to your Raspberry Pi as if it were on your local network, even if it's behind a NAT or firewall. Both Cloudflare Tunnels and Tailscale prioritize security and ease of setup, making them popular choices for advanced users.Ngrok: Secure Tunneling for Specific Needs
Ngrok is another powerful tool for creating secure tunnels to expose local services to the internet. This guide shows you how to set remote access to your Raspberry Pi from anywhere using the powerful Ngrok tool. It's particularly useful for quickly sharing a local web server, an SSH connection, or any other service running on your Pi with the outside world, without needing to configure your router. **How it works:** Ngrok creates a secure tunnel from a public endpoint (a URL or IP address) to your local machine, allowing external traffic to reach your Pi. **Pros:** * **Instant Public Access:** Quickly expose local services to the internet. * **No Port Forwarding:** Bypasses router configuration. * **Temporary or Persistent Tunnels:** Useful for testing or demonstrations. **Cons:** * **Rate Limits:** Free tier has limitations. * **Security:** While the tunnel itself is secure, exposing services publicly always carries inherent risks. Ngrok is a great tool for specific, often temporary, remote access needs, especially for developers.Setting Up Remote Access: A General Guide
Regardless of the method you choose, the general steps to set up remote access to your Raspberry Pi involve a few common prerequisites and configurations. 1. **Prepare your Raspberry Pi:** * **Install Raspberry Pi OS:** Ensure you have the latest version installed. * **Update and Upgrade:** Always run `sudo apt update && sudo apt full-upgrade` to keep your system current. * **Enable the Service:** Whether it's SSH, VNC, or Raspberry Pi Connect, ensure the corresponding service is enabled on your Pi. * **Static IP (Optional but Recommended for Local Network):** Assigning a static IP address to your Pi on your local network prevents its IP from changing, which can break your remote connection. This is configured in your router or the Pi's network settings. 2. **Network Configuration:** * **Local Network:** For local network access (e.g., SSH or VNC from another computer in your home), simply ensure both devices are on the same network. * **Internet Access (Outside Home Network):** * **Port Forwarding:** For direct SSH/VNC access from the internet, you'll need to configure port forwarding on your router to direct incoming traffic on a specific port to your Pi's local IP address. This can be complex and poses security risks if not done carefully. * **VPN (Virtual Private Network):** Setting up a VPN server (either on your router or another device) allows you to connect to your home network securely from anywhere, making your remote device appear as if it's locally connected. This is a highly recommended secure approach. * **Cloud Services/Tunnels:** Services like Raspberry Pi Connect, Cloudflare Tunnels, Tailscale, or Ngrok simplify this by creating secure outbound connections, bypassing the need for port forwarding. 3. **Client Setup:** * Install the necessary client software (e.g., PuTTY or OpenSSH for SSH, VNC Viewer for VNC). For web-based solutions like Raspberry Pi Connect, a modern web browser is all you need. By following these steps, you can create a robust and reliable remote connection to your Raspberry Pi, whether you are a beginner or an expert.Security Considerations for Remote Access
When you access your Raspberry Pi remotely, especially over the internet, security becomes paramount. Your Raspberry Pi, if not properly secured, can become an entry point into your home network. Follow these secure methods to access your Pi and protect your data: 1. **Change Default Credentials:** The very first thing you should do is change the default `pi` username and `raspberry` password. This is a critical step. 2. **Use Strong Passwords:** For any accounts on your Pi or remote access services, use long, complex, and unique passwords. Consider a password manager. 3. **SSH Key Authentication:** For SSH, instead of passwords, use SSH key pairs. This is significantly more secure. You generate a public key on your Pi and a private key on your local machine. The private key never leaves your local machine. 4. **Disable Password Authentication for SSH (after setting up keys):** Once you have SSH keys working, disable password-based SSH login in the `/etc/ssh/sshd_config` file. 5. **Change Default SSH Port:** While not a security measure in itself, changing the default SSH port (22) to a non-standard one can reduce the number of automated attack attempts (bots scanning for open port 22). 6. **Firewall (UFW):** Enable and configure a firewall (like UFW - Uncomplicated Firewall) on your Raspberry Pi to restrict incoming connections to only necessary ports (e.g., your chosen SSH port, VNC port). 7. **VPN (Virtual Private Network):** As mentioned, using a VPN to connect to your home network before accessing your Pi is one of the most secure methods. This encrypts all traffic and makes your Pi inaccessible to the public internet directly. 8. **Keep Software Updated:** Regularly update your Raspberry Pi OS and all installed software (`sudo apt update && sudo apt full-upgrade`). Updates often include security patches. 9. **Monitor Logs:** Periodically check your Pi's system logs for unusual activity. 10. **Two-Factor Authentication (2FA):** If a remote access service offers 2FA, enable it. Prioritizing security is not an option; it's a necessity when enabling remote access.Troubleshooting Common Remote Access Issues
Even with careful setup, you might encounter issues when trying to access your Raspberry Pi remotely. Here are some common problems and their solutions: 1. **"Connection Refused" or "Connection Timed Out":** * **Incorrect IP Address:** Double-check your Pi's IP address. * **SSH/VNC Server Not Running:** Ensure the service is enabled and running on your Pi. * **Firewall Blocking:** Check if your Pi's firewall (UFW) or your router's firewall is blocking the connection. * **Port Forwarding Issues:** If accessing from outside your network, verify your router's port forwarding rules. * **Pi is Off:** The simplest reason – make sure your Raspberry Pi is powered on and connected to the network. 2. **"Permission Denied" (SSH):** * **Incorrect Username/Password:** Ensure you're using the correct credentials. * **SSH Keys Not Set Up Correctly:** If using key authentication, verify your public key is on the Pi and your private key is correctly configured on your client. * **Password Authentication Disabled:** If you disabled password authentication, you must use SSH keys. 3. **Slow or Laggy VNC Connection:** * **Network Speed:** Your internet connection (upload speed on the Pi's side, download speed on your client's side) might be too slow. * **Pi Resources:** The Raspberry Pi might be under heavy load, or its CPU/RAM might be maxed out. * **VNC Quality Settings:** Reduce the color depth or image quality settings in your VNC viewer. * **Network Congestion:** Other devices on your network might be consuming bandwidth. 4. **Remote Access Works Locally, but Not Remotely (from outside network):** * **No Public IP:** Your ISP might be using Carrier-Grade NAT (CGNAT), preventing direct inbound connections. This is where VPNs or tunnel services like Cloudflare Tunnels/Tailscale/Ngrok become essential. * **Dynamic IP Address:** Your home's public IP address might change. Use a Dynamic DNS (DDNS) service to keep your domain name updated with your current IP. * **Router Firewall:** Your router's firewall might be blocking the connection even if port forwarding is configured. Patience and systematic troubleshooting are key to resolving remote access issues.The Future of Raspberry Pi Remote Access
The landscape of remote access for the Raspberry Pi is continuously evolving. With the official introduction of Raspberry Pi Connect, the foundation is clearly aiming to make remote access more accessible and user-friendly for everyone. This move signifies a recognition of the growing demand for seamless connectivity to these versatile devices. We can expect further refinements in official tools, potentially integrating more features and improving performance. Simultaneously, community-driven solutions like Cloudflare Tunnels and Tailscale will continue to innovate, offering powerful, secure, and flexible alternatives for advanced users and specific use cases. From SSH to VNC and Raspberry Pi Connect, the variety of tools ensures easy, flexible, and safe remote control, catering to both beginners and seasoned enthusiasts. The future promises even more streamlined, secure, and intuitive ways to interact with your Raspberry Pi, truly unlocking its potential to be a device that is always within your reach, no matter where you are.Conclusion
The ability to access your Raspberry Pi remotely is a powerful capability that extends its utility far beyond your local network. We've explored the core methods like SSH for command-line control, VNC for a full desktop experience, and the exciting new official solution, Raspberry Pi Connect. We also delved into advanced options like Cloudflare Tunnels, Tailscale, and Ngrok for more complex networking scenarios. By understanding these methods and, crucially, implementing robust security practices, you can confidently manage your Raspberry Pi projects, troubleshoot issues, and leverage its capabilities from anywhere in the world. The journey to mastering remote access is an empowering one, transforming your small single-board computer into a globally accessible powerhouse. Now that you're equipped with this knowledge, why not try setting up remote access for your own Raspberry Pi? Share your experiences in the comments below, or explore other articles on our site for more Raspberry Pi tips and tricks! The world of remote computing awaits.Related Resources:

Detail Author:
- Name : Piper Baumbach
- Username : xleffler
- Email : jarret.will@hotmail.com
- Birthdate : 1994-12-10
- Address : 13238 Langworth Corners Suite 743 Dareborough, NH 30121
- Phone : 1-916-303-1679
- Company : Raynor-Cruickshank
- Job : Biochemist or Biophysicist
- Bio : Omnis placeat error nostrum sunt esse nesciunt. Laudantium quia sit quam est sed corporis. Consequatur quas recusandae sed ipsa iure sint deserunt. Culpa soluta sunt quis dolore et.
Socials
tiktok:
- url : https://tiktok.com/@bogisich2024
- username : bogisich2024
- bio : Dolor rerum id cupiditate ad quia voluptatem.
- followers : 1577
- following : 526
twitter:
- url : https://twitter.com/emma_official
- username : emma_official
- bio : Laborum mollitia ab magni voluptatem assumenda aliquid vel. Accusamus praesentium sunt voluptate vitae dignissimos.
- followers : 414
- following : 2676
