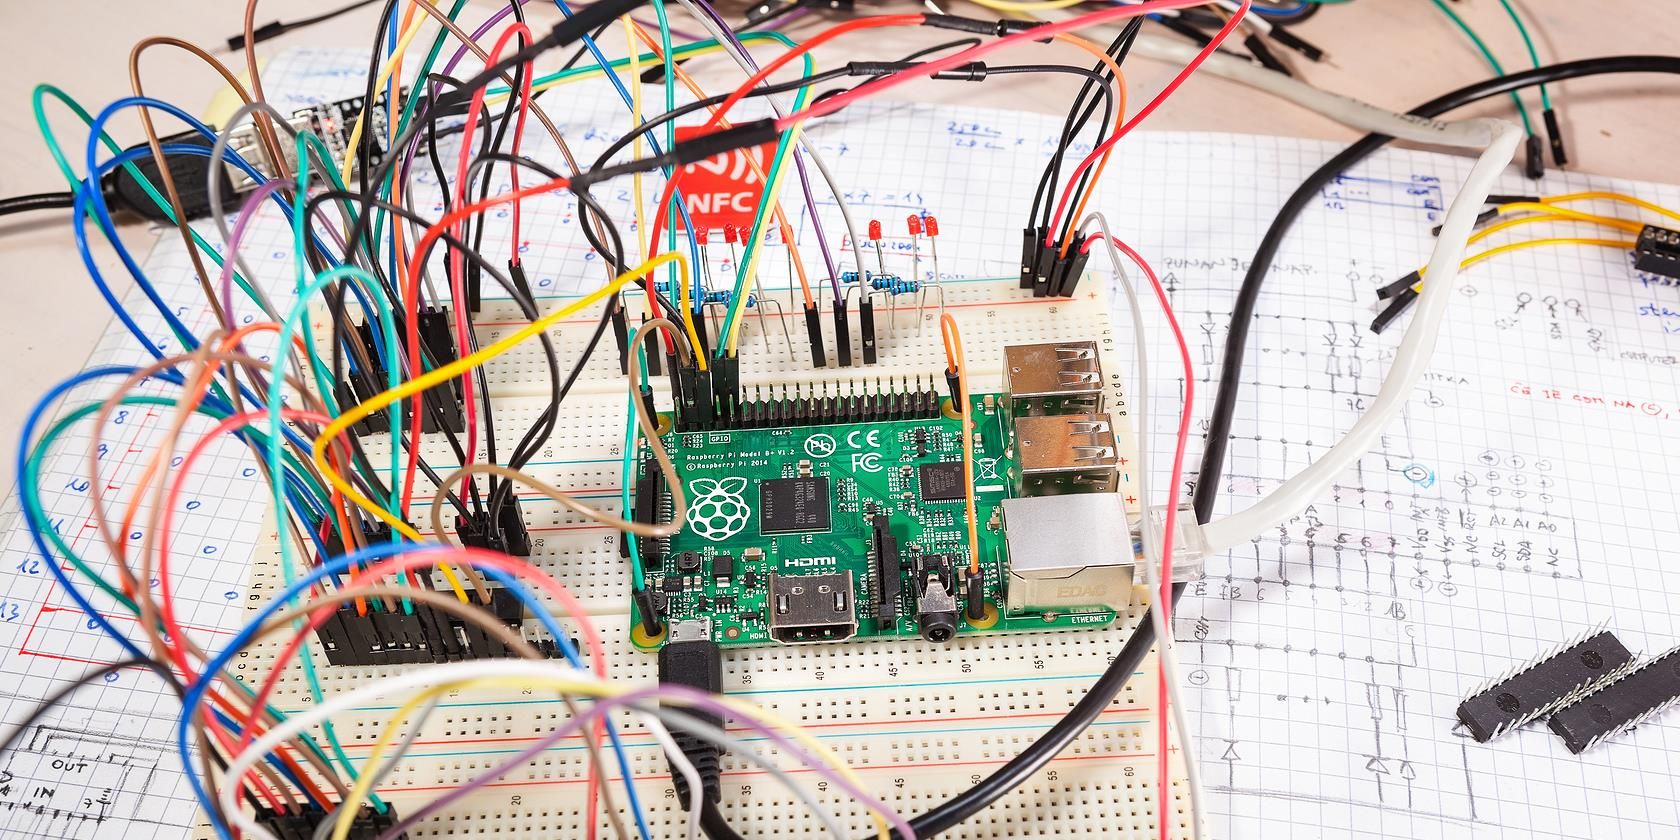
The Raspberry Pi, a compact yet incredibly powerful single-board computer, has revolutionized how enthusiasts, educators, and professionals approach computing. From home automation hubs and media centers to sophisticated IoT devices and personal servers, its versatility knows no bounds. However, a common challenge arises when you want to interact with your Pi without being physically present. This is where the crucial skill of accessing your Raspberry Pi remotely over the internet comes into play, transforming it from a local device into a truly global one.
- Fem Bottom Twitter
- Jp Leaked Video
- Big Jim Murray Twitter
- Flo Milli Twitter
- Love And Light Tv Yes King Full Video Twitter
Imagine managing your smart home from vacation, checking on a remote sensor, or simply accessing files on your personal cloud server powered by a tiny Pi, all from anywhere with an internet connection. This guide will demystify the process, walking you through various methods to establish a secure and reliable connection to your Raspberry Pi, ensuring you can harness its full potential no matter where you are.
Table of Contents
- Why Remote Access Your Raspberry Pi?
- Essential Prerequisites for Remote Access
- Method 1: SSH – The Command Line Powerhouse
- Method 2: VNC – Graphical Interface Anywhere
- Method 3: VPN – The Secure Tunnel
- Method 4: Cloud Services & Tunnels – Simpler External Access
- Critical Security Considerations for Remote Access
- Troubleshooting Common Remote Access Issues
- Conclusion
Why Remote Access Your Raspberry Pi?
The ability to access your Raspberry Pi remotely over the internet isn't just a convenience; it's often a necessity for many projects and use cases. Here's why it's such a valuable skill:
- Headless Operation: Many Raspberry Pi projects don't require a monitor, keyboard, or mouse. They run "headless" in the background. Remote access allows you to configure, manage, and troubleshoot these devices without needing to connect peripherals every time.
- IoT and Home Automation: If your Pi is controlling smart lights, monitoring environmental sensors, or managing a security camera system, remote access is essential to interact with these systems from outside your home network.
- Personal Servers: Running a personal cloud, a web server, a VPN server, or a media server on your Pi means you'll want to access your files or services from anywhere in the world.
- Deployment in Remote Locations: For projects deployed in difficult-to-reach locations, like weather stations in remote areas or surveillance systems, remote access is the only practical way to maintain them.
- Educational and Development Purposes: Students and developers can work on their Pi projects from different computers or locations, sharing access with collaborators without needing physical proximity.
- Resource Efficiency: Instead of dedicating a full-sized computer to a task, a low-power Raspberry Pi can handle it, and remote access ensures you're always in control.
In essence, remote access liberates your Raspberry Pi from the confines of your local network, unlocking a world of possibilities for deployment, management, and innovation.
Essential Prerequisites for Remote Access
Before diving into the methods for accessing your Raspberry Pi remotely over the internet, ensure you have the following foundational elements in place:
- A Powered-On Raspberry Pi: This might seem obvious, but your Pi needs to be running and connected to power.
- Raspberry Pi OS (or another compatible OS) Installed: For most users, Raspberry Pi OS (formerly Raspbian) is the recommended operating system. Ensure it's up-to-date by running
sudo apt update && sudo apt upgrade -y. - Network Connectivity: Your Pi must be connected to your local network, either via Ethernet cable or Wi-Fi. It needs an active internet connection to be accessible from outside.
- SSH Enabled: Secure Shell (SSH) is the backbone of most remote command-line interactions. It's disabled by default on newer Raspberry Pi OS versions for security reasons. We'll cover how to enable it.
- Knowing Your Pi's Local IP Address: You'll need this to connect to your Pi from within your local network before you can set up external access. You can find it using
hostname -Ion the Pi itself or by checking your router's connected devices list. - Router Access: To configure port forwarding or check your public IP address, you'll need administrative access to your home or office router. This usually involves logging in via a web browser using credentials found on the router's sticker or in its manual.
- Understanding Your Public IP Address: Your home network has a public IP address assigned by your Internet Service Provider (ISP). This is the address you'll use to access your Pi from outside your local network. You can find it by searching "what is my IP" on Google. Be aware that many ISPs provide dynamic IP addresses, which can change.
- Dynamic DNS (DDNS) Service (Optional but Recommended): If your ISP assigns a dynamic public IP address, a DDNS service (like No-IP, DuckDNS, or FreeDNS) maps a memorable hostname (e.g.,
my-pi-home.ddns.net) to your ever-changing public IP. This means you don't have to constantly check your IP.
Having these prerequisites sorted will make the entire process of setting up remote access much smoother and more secure.
Method 1: SSH – The Command Line Powerhouse
SSH (Secure Shell) is the most fundamental and widely used method for accessing your Raspberry Pi remotely over the internet. It provides a secure, encrypted connection for command-line interface (CLI) access, allowing you to execute commands, transfer files, and manage your Pi as if you were sitting right in front of it.
Enabling SSH on Your Raspberry Pi
As mentioned, SSH is disabled by default on recent Raspberry Pi OS images. You have a few ways to enable it:
- Using `raspi-config` (if you have a monitor/keyboard connected):
- Boot your Raspberry Pi.
- Open a terminal and type:
sudo raspi-config - Navigate to `Interface Options`.
- Select `P2 SSH` and choose `Yes` to enable it.
- Reboot your Pi:
sudo reboot
- Creating an `ssh` file (headless setup):
- If you're setting up a new Pi or don't have a monitor, you can enable SSH by placing an empty file named `ssh` (no extension) in the `boot` partition of your SD card.
- When the Pi boots, it detects this file and enables SSH. The file will be deleted automatically.
Connecting via SSH from Anywhere
Once SSH is enabled, you can connect from another computer. The command is straightforward:
ssh username@ip_addressFor example, if your Pi's default username is `pi` and its local IP is `192.168.1.100`, you'd type: ssh pi@192.168.1.100. You'll be prompted for the password (default is `raspberry`).
To access your Raspberry Pi remotely over the internet, you'll need to configure your router for **port forwarding**:
- Assign a Static Local IP to Your Pi: This prevents your Pi's local IP from changing, which would break your port forward rule. You can do this in your router's settings (DHCP reservation) or on the Pi itself (advanced).
- Log into Your Router: Access your router's administration page (usually by typing its gateway IP, like `192.168.1.1` or `192.168.0.1`, into a web browser).
- Find Port Forwarding Settings: Look for sections like "Port Forwarding," "NAT," or "Virtual Servers."
- Create a New Rule:
- External Port (WAN Port): Choose a high, non-standard port number (e.g., `2222`, `49152`) for external access. **Never use port 22 directly for external access** as it's a common target for attacks.
- Internal Port (LAN Port): This should be `22` (the standard SSH port on your Pi).
- Internal IP Address: Enter your Raspberry Pi's static local IP address.
- Protocol: Select `TCP`.
- Description: Add a descriptive name like "Pi SSH Access."
- Save and Apply: Save the rule and reboot your router if necessary.
Now, from an external network, you can connect using your public IP address (or DDNS hostname) and the external port you chose:
ssh pi@your_public_ip_or_ddns_hostname -p 2222Security Considerations for SSH:
- Change Default Password: Immediately change the default `pi` user password using `passwd`.
- Use Strong Passwords: For all users.
- SSH Key-Based Authentication: This is highly recommended. Generate an SSH key pair on your client machine and copy the public key to your Pi. Then, disable password authentication for SSH. This is far more secure than passwords.
- Change SSH Port: As mentioned, use a non-standard external port for port forwarding. You can also change the internal SSH port on your Pi by editing `/etc/ssh/sshd_config` (change `Port 22` to something else, then `sudo systemctl restart ssh`).
- Firewall (UFW): Enable and configure UFW (Uncomplicated Firewall) on your Pi to only allow SSH connections from specific IPs or your local network.
SSH is powerful, but it requires diligence in securing your connection, especially when exposing it to the internet.
Method 2: VNC – Graphical Interface Anywhere
While SSH is excellent for command-line tasks, sometimes you need a full graphical desktop environment. This is where VNC (Virtual Network Computing) comes in. VNC allows you to see and interact with your Raspberry Pi's desktop as if you were sitting in front of it, using a VNC client on your computer, tablet, or smartphone.
The most popular and recommended VNC server for Raspberry Pi OS is RealVNC Connect, which is pre-installed on the desktop versions of Raspberry Pi OS.
Setting up VNC on your Raspberry Pi:
- Enable VNC:
- Open a terminal on your Pi and type:
sudo raspi-config - Navigate to `Interface Options`.
- Select `P3 VNC` and choose `Yes` to enable it.
- RealVNC Server will start automatically.
- Open a terminal on your Pi and type:
- Configure RealVNC Connect (Optional, for Cloud Connectivity):
- On your Pi's desktop, click the VNC icon in the top right corner.
- Follow the prompts to sign in or create a RealVNC account. This will link your Pi to your RealVNC account, allowing you to connect via their cloud service without direct port forwarding (though direct connections are still possible).
- Set a VNC Password: When you connect for the first time, you'll be prompted to set a password for VNC connections. This is separate from your Pi's user password.
Connecting to your Raspberry Pi via VNC:
- Download a VNC Client: On your client device (PC, Mac, Linux, Android, iOS), download the RealVNC Viewer application from the RealVNC website.
- Connect via RealVNC Cloud (Recommended for Internet Access):
- Open RealVNC Viewer and sign in with the same RealVNC account you used on your Pi.
- Your Pi should appear in your list of online computers. Simply click on it to connect. This method handles the complex networking (like port forwarding) for you, routing the connection securely through RealVNC's servers.
- Connect Directly (Requires Port Forwarding):
- If you prefer not to use the RealVNC cloud or if you have specific network configurations, you can connect directly.
- You'll need to configure port forwarding on your router for VNC. The default VNC port is `5900`. Similar to SSH, **do not expose port 5900 directly to the internet**. Forward an external high port (e.g., `59010`) to internal port `5900` on your Pi's static local IP.
- In your VNC Viewer, enter `your_public_ip_or_ddns_hostname:59010` (or `your_public_ip_or_ddns_hostname::59010` for some clients).
Security Considerations for VNC:
- Strong VNC Password: Always use a strong, unique password for your VNC connection.
- Encryption: RealVNC Connect provides built-in encryption. If using other VNC servers or direct connections, consider tunneling VNC traffic through an SSH tunnel for added security (e.g., `ssh -L 5901:localhost:5900 pi@your_public_ip_or_ddns_hostname -p 2222`, then connect VNC client to `localhost:5901`).
- Limit Access: Only enable VNC when needed, or restrict access to specific IP addresses using firewall rules.
VNC offers a seamless graphical experience, making it ideal for tasks that require visual interaction with your Raspberry Pi's desktop environment.
Method 3: VPN – The Secure Tunnel
For the highest level of security and flexibility when accessing your Raspberry Pi remotely over the internet, setting up a Virtual Private Network (VPN) server on your Pi is an excellent solution. A VPN creates an encrypted tunnel between your client device and your home network, making it appear as if your client device is physically connected to your home network. This means you can access your Pi and any other device on your home network securely, without needing to port forward individual services.
Why use a VPN?
- Enhanced Security: All traffic between your client and your home network is encrypted, protecting it from eavesdropping, especially on public Wi-Fi.
- Access to All Local Devices: Once connected to your VPN, you can access your Pi, network-attached storage (NAS), smart home devices, and any other device on your home network using their local IP addresses, just as if you were home.
- Bypasses Port Forwarding Risks: You only need to port forward one VPN port on your router, rather than individual ports for SSH, VNC, etc., reducing your attack surface.
Popular VPN Server Options for Raspberry Pi:
- OpenVPN: A robust, open-source VPN solution. It's highly configurable but can be more complex to set up manually. There are scripts like `pivpn.io` that simplify the installation process significantly.
- WireGuard: A newer, faster, and simpler VPN protocol compared to OpenVPN. It's gaining popularity due to its efficiency and ease of configuration. `pivpn.io` also supports WireGuard.
General Steps to Set up a VPN Server on Your Pi (using PiVPN as an example):
- Update Your Pi: Ensure your Pi is up-to-date:
sudo apt update && sudo apt upgrade -y. - Install PiVPN: Run the automated installer:
curl -L https://install.pivpn.io | bash - Follow On-Screen Prompts: The script will guide you through the setup process:
- Choose your VPN protocol (OpenVPN or WireGuard).
- Select your local user (e.g., `pi`).
- Choose a static IP address for your Pi.
- Select your public IP or DDNS hostname for external access.
- Choose the VPN port (default for OpenVPN is 1194 UDP, WireGuard uses 51820 UDP). You'll need to port forward this single port on your router.
- Enable unattended upgrades (recommended for security).
- Reboot when prompted.
- Generate Client Configurations: After rebooting, use `pivpn add` to create a new client profile. This will generate a `.ovpn` file (for OpenVPN) or a QR code/text file (for WireGuard).
- Transfer Client Configuration: Securely transfer this client file/QR code to your client device (e.g., via USB, secure file transfer, or scp).
- Install VPN Client: Download the appropriate VPN client for your device (OpenVPN Connect, WireGuard app).
- Import Configuration: Import the client profile into your VPN client.
- Connect: Connect to your VPN. Once connected, your client device will be part of your home network, and you can access your Pi using its local IP address.
Port Forwarding for VPN: You will still need to port forward one single port on your router – the VPN port you chose during PiVPN setup (e.g., 1194 UDP for OpenVPN, 51820 UDP for WireGuard). This is the only port you need to expose to the internet for comprehensive remote access.
Setting up a VPN is a more advanced method, but the security and flexibility it offers for accessing your Raspberry Pi remotely over the internet and your entire home network make it well worth the effort for those who prioritize privacy and comprehensive access.
Method 4: Cloud Services & Tunnels – Simpler External Access
For users who want to access their Raspberry Pi remotely over the internet without dealing with the complexities of router configuration (like port forwarding) or dynamic IP addresses, several cloud-based services and tunneling solutions offer a simpler alternative. These services create a secure tunnel from your Pi to their cloud, allowing you to access your Pi through their infrastructure.
How they work: Your Raspberry Pi initiates an outbound connection to the cloud service's server. Since this is an outbound connection, it typically bypasses router firewalls and NAT (Network Address Translation) that would otherwise block incoming connections. The cloud service then acts as a relay, allowing you to connect to your Pi through their public servers.
Popular Cloud Services and Tunneling Solutions:
- RealVNC Connect: (Already mentioned under VNC) This service offers cloud connectivity for VNC, making it incredibly easy to access your Pi's desktop without port forwarding. Your Pi registers with RealVNC's cloud, and you connect via their viewer using your RealVNC account. It's a very user-friendly option for graphical access.
- Dataplicity:
- Features: Provides a web-based terminal for SSH access, a web interface for any web server running on your Pi, and even a "Wormhole" for temporary direct access to specific ports.
- Setup: Involves running a simple one-line command on your Pi to install their agent and link it to your account.
- Pros: Extremely easy to set up, no port forwarding needed, reliable.
- Cons: Relies on a third-party service, free tier has limitations.
- Ngrok:
- Features: Creates secure, public URLs for services running locally on your Pi. Ideal for temporarily exposing a web server, SSH, or other services to the internet for testing or sharing.
- Setup: Download the Ngrok client, authenticate with your Ngrok token, and then run commands like `ngrok tcp 22` for SSH or `ngrok http 80` for a web server.
- Pros: Very flexible, on-demand tunnels, great for development and quick demos.
- Cons: Free tier URLs are temporary (change each time you start the tunnel), requires the Ngrok client to be running on your Pi.
- Remote.it:
- Features: Similar to Dataplicity, it provides secure, persistent connections to services on your Pi (SSH, VNC, HTTP, etc.) without port forwarding.
- Setup: Install their agent on your Pi, register your device, and then configure services through their web portal.
- Pros: User-friendly interface, supports many protocols, robust.
- Cons: Relies on a third-party service, free tier has limitations on device count.
- Tailscale / ZeroTier (Mesh VPNs):
- Features: These are "zero-config" VPNs that create a secure mesh network between your devices, regardless of their location or network configuration. Your Pi and client devices join a private network, and you access them using their private Tailscale/ZeroTier IP addresses.
- Setup: Install the client on your Pi and client devices, authenticate them with your account.
- Pros: Extremely easy to set up, highly secure, no port forwarding needed, allows direct peer-to-peer connections when possible.
- Cons: Still relies on a third-party for initial connection brokering, though data often flows directly peer-to-peer.
These cloud services and tunneling solutions provide a convenient and often more secure way to access your Raspberry Pi remotely over the internet, especially for users who are less comfortable with router configurations. They abstract away much
Related Resources:


Detail Author:
- Name : Rhiannon Schultz
- Username : mae.christiansen
- Email : kendall.weissnat@moen.com
- Birthdate : 1972-09-13
- Address : 64377 Jaskolski Ranch Apt. 342 North Dorris, DE 64207
- Phone : (650) 868-4273
- Company : Bartoletti PLC
- Job : Homeland Security
- Bio : Voluptatem necessitatibus et odio non in perferendis. Et esse ipsam quod aut tenetur. Odit id est occaecati. Omnis mollitia vel in et laudantium dolor.
Socials
tiktok:
- url : https://tiktok.com/@theron1323
- username : theron1323
- bio : Quia quas blanditiis non odit non est est molestias.
- followers : 237
- following : 1577
linkedin:
- url : https://linkedin.com/in/theron5402
- username : theron5402
- bio : Eos omnis provident dolores autem sit aut vero.
- followers : 5331
- following : 438
facebook:
- url : https://facebook.com/windlert
- username : windlert
- bio : Cupiditate maxime aut quaerat inventore dolorem.
- followers : 1464
- following : 1016
twitter:
- url : https://twitter.com/theron3876
- username : theron3876
- bio : Dignissimos atque quia qui velit natus deleniti. Magni nihil possimus assumenda odio. Fugiat placeat nemo error quia.
- followers : 468
- following : 1991
