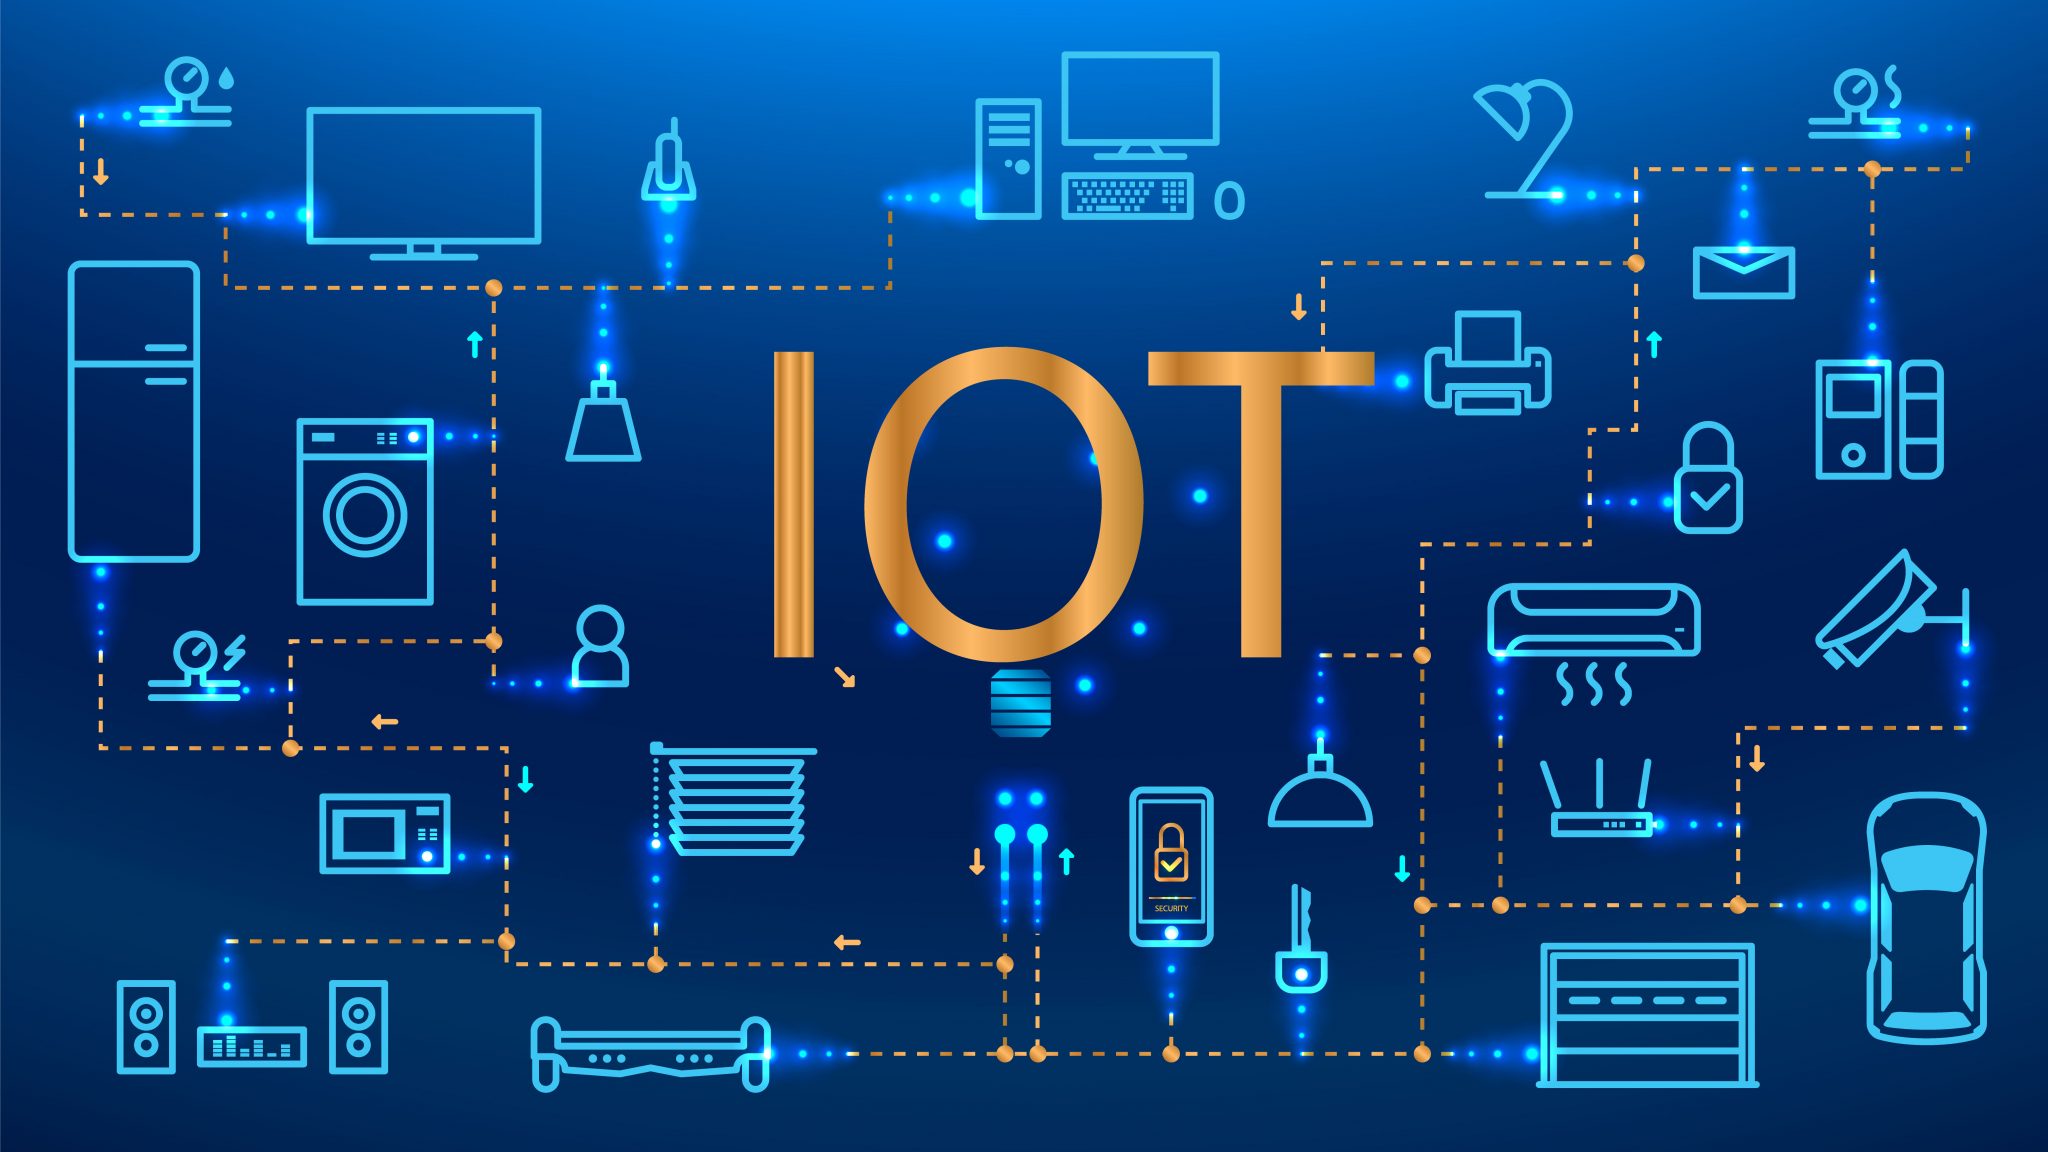
**In an increasingly connected world, the Internet of Things (IoT) stands at the forefront of innovation, transforming everything from smart homes to industrial automation. For enthusiasts, developers, and even small businesses, the idea of managing these devices remotely and securely, without incurring significant costs, is incredibly appealing. This is where the concept of leveraging `iot ssh web free` solutions becomes not just a possibility, but a practical reality, offering powerful tools for control and monitoring right from your browser.** Navigating the landscape of IoT can seem daunting, especially when considering the technical complexities and potential expenses involved in device management. However, by embracing open-source tools and clever configurations, you can establish robust, secure, and accessible remote management systems for your IoT ecosystem, all without breaking the bank. This article delves into how you can harness the power of Secure Shell (SSH) and web interfaces to achieve free, efficient, and secure control over your IoT devices. We'll explore the foundational technologies, practical implementation steps, and crucial security considerations, ensuring you can build and manage your IoT projects effectively and affordably.
Table of Contents
- Understanding the Core: IoT, SSH, and Web Interfaces
- The Promise of "Free" in IoT Management
- Setting Up Free SSH Access for Your IoT Devices
- Building Free Web Interfaces for IoT Monitoring and Control
- Practical Scenarios for "IoT SSH Web Free" Implementations
- Security Considerations for Free IoT Solutions
- Overcoming Challenges and Limitations
- The Future Landscape of IoT Management
Understanding the Core: IoT, SSH, and Web Interfaces
To truly appreciate the potential of `iot ssh web free` solutions, it's essential to grasp the fundamental components at play. Each element—IoT, SSH, and web interfaces—plays a distinct yet interconnected role in creating a seamless and secure remote management system for your connected devices.What is the Internet of Things (IoT)?
The Internet of Things (IoT) refers to a vast network of physical objects embedded with sensors, software, and other technologies for the purpose of connecting and exchanging data with other devices and systems over the internet. These "things" range from everyday household items like smart thermostats and light bulbs to industrial machinery and complex environmental monitoring systems. The core idea is to enable these objects to collect data, communicate with each other, and respond to commands, often without human intervention. This connectivity unlocks unprecedented opportunities for automation, data analysis, and improved efficiency across various sectors. For developers and hobbyists, small, low-cost microcontrollers like the ESP32, ESP8266, and single-board computers such as the Raspberry Pi are common platforms for building custom IoT devices, making the entry barrier relatively low for those looking to experiment with `iot ssh web free` concepts.The Power of Secure Shell (SSH) in IoT
Secure Shell (SSH) is a cryptographic network protocol for operating network services securely over an unsecured network. Its most prominent application is remote command-line login and remote command execution. For IoT devices, SSH is an indispensable tool. Imagine you have a Raspberry Pi collecting sensor data in your backyard, and you need to access its files, run a script, or troubleshoot an issue without physically connecting a monitor and keyboard. SSH allows you to do exactly that, providing a secure, encrypted channel over which you can send commands and receive output. This capability is crucial for managing devices deployed in remote locations or those without direct physical access. When we talk about `iot ssh web free`, SSH provides the secure backbone for interacting directly with the device's operating system, enabling powerful and flexible remote administration. It's the go-to method for developers to deploy code, update firmware, and configure settings on their IoT fleet.Why Web Interfaces Matter for IoT Devices
While SSH offers powerful command-line control, it's not always the most user-friendly approach, especially for monitoring data or for users who aren't comfortable with command-line interfaces. This is where web interfaces come into play. A web interface, or web UI, provides a graphical, browser-based way to interact with your IoT device. Instead of typing commands, you can click buttons, view real-time graphs, and adjust settings through an intuitive dashboard. For example, a web interface could display the current temperature from a sensor, allow you to toggle a light, or even show a live video feed. Integrating a web interface with your `iot ssh web free` setup means you can access and control your devices from any web-enabled device—a laptop, tablet, or smartphone—without needing specialized software beyond a standard web browser. This significantly enhances accessibility and usability, making IoT management more approachable for a wider audience.The Promise of "Free" in IoT Management
The allure of "free" solutions in technology is powerful, especially for projects with limited budgets or for individuals just starting their journey in IoT. When it comes to `iot ssh web free` solutions, "free" often refers to leveraging open-source software, community-driven tools, and free tiers offered by various services. This approach can drastically reduce the initial investment required to get your IoT projects off the ground.Exploring Free Tiers and Open-Source Solutions
Many cloud providers and service platforms offer "free tiers" designed to let users experiment with their services without charge, up to certain usage limits. While these aren't typically for direct SSH access *to your device* from the cloud, they can be used for things like data storage, message queuing (e.g., MQTT brokers), or even running small server instances that act as a bridge to your devices. However, the true power of "free" in `iot ssh web free` often lies in the vast ecosystem of open-source software. Projects like Node-RED, OpenHAB, Home Assistant, and various lightweight web servers (e.g., Flask, Node.js Express, Apache, Nginx) can be run directly on your IoT device (like a Raspberry Pi) or on a local server. These tools are developed and maintained by communities, meaning they are free to use, modify, and distribute. They provide the building blocks for creating custom web interfaces and managing SSH connections without licensing fees. For instance, you can use an open-source SSH client to connect to your device, and an open-source web server running on the device itself to host your control panel.The True Cost of "Free": What to Consider
While the monetary cost of `iot ssh web free` solutions can be minimal, it's crucial to understand that "free" rarely means "zero cost." There are often hidden costs or trade-offs to consider: * **Time Investment:** Setting up and maintaining open-source solutions often requires a significant time investment in learning, configuration, and troubleshooting. You'll be responsible for updates, security patches, and debugging. * **Technical Expertise:** While user-friendly interfaces exist, getting the most out of free tools often requires a certain level of technical expertise in networking, programming, and system administration. * **Scalability Limitations:** Free tiers of cloud services usually have strict usage limits. If your IoT project grows, you might quickly hit these limits and need to upgrade to a paid plan. Self-hosted open-source solutions are limited by the hardware capabilities of your device. * **Support:** Unlike commercial products that offer dedicated customer support, free and open-source solutions rely on community forums, documentation, and your own problem-solving skills. While communities are often vibrant and helpful, immediate, personalized support is not guaranteed. * **Hardware Costs:** While software might be free, you still need to purchase the IoT devices themselves (e.g., Raspberry Pi, sensors, actuators). * **Reliability and Uptime:** Free services might not offer the same level of uptime guarantees or reliability as paid enterprise solutions. For critical applications, this could be a significant concern. Understanding these factors helps in making informed decisions, ensuring that the "free" approach aligns with your project's goals and resources.Setting Up Free SSH Access for Your IoT Devices
Establishing SSH access to your IoT devices is a foundational step in enabling `iot ssh web free` management. For many popular IoT platforms like the Raspberry Pi, SSH is either enabled by default or can be easily activated. Here's a general outline of how to set up free SSH access: 1. **Enable SSH on Your Device:** * **Raspberry Pi:** For a fresh Raspberry Pi OS install, you can enable SSH by creating an empty file named `ssh` (no extension) in the boot directory of the SD card. Alternatively, after booting, use `sudo raspi-config` and navigate to `Interface Options` -> `SSH` -> `Enable`. * **Other Linux-based IoT devices:** SSH daemon (usually `sshd`) is often pre-installed. You might just need to ensure it's running and configured correctly. For example, `sudo systemctl enable ssh` and `sudo systemctl start ssh`. 2. **Find Your Device's IP Address:** Your IoT device will need an IP address on your local network. You can typically find this using commands like `hostname -I` on the device itself, by checking your router's connected devices list, or by using network scanning tools like Nmap on another computer. 3. **Connect from Your Computer:** * **Linux/macOS:** Open a terminal and use the `ssh` command: `ssh username@device_ip_address` (e.g., `ssh pi@192.168.1.100`). * **Windows:** Use a client like PuTTY or the built-in OpenSSH client in PowerShell/Command Prompt (available in Windows 10/11): `ssh username@device_ip_address`. * The first time you connect, you'll be asked to confirm the device's fingerprint. * You'll then be prompted for the password for the specified username. 4. **Enhance Security with SSH Keys (Highly Recommended):** * Instead of passwords, use SSH keys for a more secure and convenient login. This is a critical step for any `iot ssh web free` setup. * **Generate a key pair:** On your local machine, run `ssh-keygen`. This creates a public key (`id_rsa.pub`) and a private key (`id_rsa`). * **Copy the public key to your IoT device:** Use `ssh-copy-id username@device_ip_address` or manually copy the contents of `id_rsa.pub` into `~/.ssh/authorized_keys` on your IoT device. * **Disable password authentication (optional but recommended for production):** Edit `/etc/ssh/sshd_config` on your IoT device, set `PasswordAuthentication no`, and restart the SSH service (`sudo systemctl restart ssh`). 5. **Remote Access Beyond Your Local Network (Port Forwarding/VPN):** * To access your IoT device via SSH from outside your home network, you'll typically need to configure **port forwarding** on your router. This maps an external port on your router to the internal SSH port (22) of your IoT device. Be extremely cautious with port forwarding as it exposes your device to the internet. * A more secure alternative is to use a **VPN (Virtual Private Network)**. You can set up a VPN server on your home network (e.g., using OpenVPN or WireGuard on a Raspberry Pi or your router if supported) and connect to it from anywhere. This creates a secure tunnel, making it seem like your remote device is on your local network. Many VPN solutions offer free tiers or are open-source. * Another option is using a **reverse SSH tunnel** or services like **ngrok** (which has a free tier) to create a secure tunnel from your IoT device to a public endpoint, allowing you to connect without port forwarding. By following these steps, you establish a robust and free method for secure remote command-line interaction with your IoT devices, forming the bedrock of your `iot ssh web free` management system.Building Free Web Interfaces for IoT Monitoring and Control
Once you have SSH access, the next step in achieving a full `iot ssh web free` solution is to create a user-friendly web interface. This allows for intuitive monitoring and control without needing to type commands. The beauty is that you can host these web interfaces directly on your IoT device using free, open-source web server software. Here's how you can approach building free web interfaces: 1. **Choose a Lightweight Web Server:** * **Python's Flask/Django:** Excellent for Python developers. Flask is particularly lightweight and great for small projects. You can write Python scripts to interact with hardware (e.g., GPIO pins, sensors) and expose that functionality via a simple web API or HTML pages. * **Node.js with Express:** If you prefer JavaScript, Node.js is powerful for server-side applications. Express.js is a minimalist web framework that makes it easy to set up routes for serving data and handling commands. * **Apache/Nginx:** More traditional web servers, suitable if you plan to serve static HTML/CSS/JavaScript files or use server-side scripting languages like PHP. They are robust but might be overkill for very simple IoT interfaces. * **Built-in Web Servers:** Some microcontrollers (like ESP32/ESP8266) can host simple web pages directly from their firmware, often using libraries like `ESPAsyncWebServer` in Arduino IDE. This is the most "free" in terms of additional software. 2. **Design Your Web Interface (HTML, CSS, JavaScript):** * **HTML:** Structure the content (e.g., display sensor readings, buttons for control). * **CSS:** Style the interface to make it visually appealing and easy to use. * **JavaScript:** Add interactivity. This is crucial for: * **Fetching data:** Using `fetch` or `XMLHttpRequest` to periodically request sensor data from your device's backend (which you'll set up). * **Sending commands:** Sending POST requests to trigger actions on your device (e.g., turning a light on/off). * **Real-time updates:** Using WebSockets for instant updates (e.g., live sensor graphs). Libraries like Chart.js can be used for free to visualize data. 3. **Backend Logic (Python/Node.js/etc.):** * This is the code running on your IoT device that handles requests from the web interface. * **Read Sensor Data:** Write code to interface with physical sensors connected to your device (e.g., using Python libraries for Raspberry Pi GPIO). * **Control Actuators:** Write code to control outputs like relays, LEDs, or motors. * **Expose APIs:** Create simple API endpoints (e.g., `/api/temperature`, `/api/light/on`) that your JavaScript frontend can call. When a request comes in, the backend performs the action or retrieves the data and sends it back as JSON. * **Serve Web Pages:** Configure your web server to serve the HTML, CSS, and JavaScript files to the client's browser. 4. **Example Flow for `iot ssh web free` Control:** * **User:** Opens web browser, navigates to `http://device_ip_address:port` (or public URL if port forwarded/VPN'd). * **Web Server on IoT Device:** Serves the HTML/CSS/JS files to the browser. * **Browser (JavaScript):** Periodically sends an HTTP GET request to `/api/temperature` on the IoT device. * **Backend (Python/Node.js) on IoT Device:** Reads temperature from sensor, formats it as JSON, and sends it back. * **Browser (JavaScript):** Receives JSON, updates the temperature display on the web page. * **User:** Clicks a "Turn Light On" button. * **Browser (JavaScript):** Sends an HTTP POST request to `/api/light/on`. * **Backend on IoT Device:** Receives request, activates the GPIO pin connected to the light relay. * **Backend on IoT Device:** Sends a confirmation back to the browser. By combining SSH for low-level access and a self-hosted web interface for high-level control, you create a powerful and completely free `iot ssh web free` management system that is accessible from anywhere with an internet connection. Remember to keep the web server lightweight to conserve resources on your IoT device.Practical Scenarios for "IoT SSH Web Free" Implementations
The versatility of `iot ssh web free` solutions opens up a myriad of practical applications across various domains. These methods empower individuals and small organizations to deploy custom IoT solutions without the overhead of commercial platforms, fostering innovation and accessibility. Here are a few compelling scenarios where this approach shines: * **Home Automation and Environmental Monitoring:** * **Scenario:** You want to monitor the temperature, humidity, and air quality in different rooms of your house, and perhaps control lights or fans remotely. * **Implementation:** Deploy Raspberry Pis or ESP32s with sensors in each room. Use SSH for initial setup and troubleshooting. Develop a lightweight web interface on one central Raspberry Pi (or even on each device for localized control) that aggregates data from all sensors and provides toggle buttons for smart plugs or lights. This web interface can be accessed from your phone or computer, offering a comprehensive `iot ssh web free` smart home dashboard. * **Benefit:** Complete control over your data, no reliance on third-party cloud services, and zero ongoing subscription fees. * **Remote Garden/Farm Monitoring:** * **Scenario:** You have a small garden or a few raised beds and want to monitor soil moisture, sunlight levels, and ambient temperature to optimize watering and plant health, especially when you're away. * **Implementation:** Set up a Raspberry Pi or ESP32 with soil moisture sensors, light sensors, and temperature/humidity sensors. Use SSH to deploy and update the Python/Node.js scripts that read sensor data. Create a web interface that displays historical and real-time sensor readings, perhaps with simple graphs. You could even integrate a small pump controlled via the web interface for remote irrigation. * **Benefit:** Enables precise, data-driven gardening from anywhere, ensuring your plants thrive without constant physical presence, all managed with `iot ssh web free` tools. * **Pet Monitoring and Feeding Systems:** * **Scenario:** You want to check on your pets while at work, ensure they have food, or even activate a toy remotely. * **Implementation:** A Raspberry Pi connected to a webcam, a servo-controlled food dispenser, and perhaps a motion sensor. SSH provides the means to configure the camera stream and control the servo. A web interface can display the camera feed, a button to dispense food, and alerts from the motion sensor. * **Benefit:** Peace of mind knowing your pets are fine, with the ability to interact with them remotely, using a custom-built and free `iot ssh web free` system. * **Scientific Data Collection in Remote Locations:** * **Scenario:** Researchers need to collect environmental data (e.g., weather patterns, water levels) in remote or hard-to-reach areas where continuous physical access is impractical. * **Implementation:** Ruggedized IoT devices (e.g., Raspberry Pi Zero W with low-power sensors) powered by solar panels. SSH allows for periodic data retrieval and software updates without needing to visit the site. A simple web interface, potentially accessible via a cellular modem or satellite link, could provide summary data or system health checks. * **Benefit:** Cost-effective data collection in challenging environments, enabling long-term monitoring and research with minimal intervention, powered by `iot ssh web free` principles. These examples highlight how the combination of `iot ssh web free` technologies empowers users to build bespoke solutions tailored to their exact needs, fostering innovation and independence from proprietary systems. The ability to control and monitor devices securely and affordably is a game-changer for many projects.Security Considerations for Free IoT Solutions
While the "free" aspect of `iot ssh web free` solutions is highly attractive, it's paramount to address security with utmost diligence. Neglecting security in IoT can lead to serious vulnerabilities, including data breaches, unauthorized device control, and even the compromise of your entire home network. Since you're often acting as your own system administrator, the responsibility for security falls squarely on your shoulders. Here are critical security considerations and best practices: 1. **Secure SSH Access:** * **Always use SSH Key Authentication:** As mentioned earlier, this is far more secure than passwords. Disable password authentication on your IoT device once SSH keys are set up. * **Strong Passphrases for SSH Keys:** Protect your private SSH key with a strong, unique passphrase. * **Change Default Credentials:** Never use default usernames (like `pi` for Raspberry Pi) and passwords. Create a new user with strong credentials and disable/remove the default user. * **Limit SSH Access:** If possible, restrict SSH access to specific IP addresses (e.g., your home IP or a VPN server's IP). * **Change Default SSH Port:** While not a security measure against targeted attacks, changing the default SSH port (22) to a non-standard one can reduce automated scanning attempts. * **Keep SSH Software Updated:** Regularly update the SSH client on your computer and the SSH daemon (`sshd`) on your IoT device. 2. **Web Interface Security:** * **Authentication and Authorization:** If your web interface is accessible from outside your local network, implement strong user authentication (usernames and passwords, preferably with two-factor authentication). Ensure different users have different levels of access (authorization). * **HTTPS (SSL/TLS):** Always serve your web interface over HTTPS. This encrypts communication between your browser and the IoT device, preventing eavesdropping and tampering. You can get free SSL certificates from Let's Encrypt, which can be integrated with web servers like Nginx or Apache. * **Input Validation:** Sanitize and validate all user inputs to prevent common web vulnerabilities like SQL injection (if using a database) and Cross-Site Scripting (XSS). * **Least Privilege Principle:** Ensure the web server and the backend code run with the minimum necessary permissions on the IoT device. Avoid running them as `root`. * **Avoid Hardcoding Sensitive Information:** Do not hardcode API keys, passwords, or other sensitive data directly in your code. Use environment variables or secure configuration files. 3. **Network Security:** * **Firewall Rules:** Configure a firewall on your IoT device (e.g., `ufw` on Linux) to allow only necessary incoming connections (e.g., SSH, HTTP/HTTPS) and block everything else. * **Port Forwarding Caution:** If you must use port forwarding, ensure it's configured precisely and only for the ports absolutely required. Consider using a VPN as a more secure alternative for remote access. * **Regular Software Updates:** Keep the operating system, libraries, and all software on your IoT device up to date. This patches known security vulnerabilities. * **Network Segmentation:** For advanced users, consider segmenting your IoT devices onto a separate VLAN on your network to isolate them from your main devices. 4. **Physical Security:** * **Secure Physical Access:** If your IoT device is in an accessible location, ensure it's physically secured to prevent tampering or theft. By adopting a proactive and layered approach to security, you can significantly mitigate the risks associated with `iot ssh web free` solutions, ensuring your devices remain secure and your data protected. Remember, security is an ongoing process, not a one-time setup.Overcoming Challenges and Limitations
While the `iot ssh web free` approach offers immense benefits in terms of cost and flexibility, it's not without its challenges and limitations. Understanding these hurdles is crucial for effective planning and successful deployment of your IoT projects. 1. **Scalability Issues:** * **Resource Constraints:** Single-board computers like Raspberry Pis have limited processing power, memory, and storage. Running multiple complex web services, handling high data rates, or supporting many concurrent users can quickly overwhelm them. * **Network Bandwidth:** Your home internet connection's upload speed can become a bottleneck if you're serving a web interface or streaming data to many remote users. * **Solution:** For larger deployments, consider distributing tasks across multiple devices, optimizing your code for efficiency, or eventually migrating to more robust (and potentially paid) cloud infrastructure if the project outgrows the free tier capabilities. 2. **Reliability of Free Services and Hardware:** * **Hardware Longevity:** Consumer-grade IoT devices are not always designed for 24/7 industrial-grade operation. SD card corruption (especially on Raspberry Pi) due to frequent writes or power loss is a common issue. * **Internet Connectivity:** Reliance on your home internet connection means any outage will cut off remote access to your devices. * **Community Support Variability:** While open-source communities are great, the level of support can vary. You might not get immediate answers to complex problems, and documentation might be sparse for niche issues. * **Solution:** Use high-quality SD cards (industrial-grade if possible), implement read-only file systems where appropriate, consider battery backups (UPS) for power stability, and have a plan for local access if remote access fails. For critical applications, redundancy might be necessary. 3. **Dynamic IP Addresses and Remote Access:** * Most home internet connections use dynamic IP addresses, meaning your public IP address can change periodically. This makes it difficult to consistently access your devices via port forwarding. * **Solution:** * **Dynamic DNS (DDNS):** Services like DuckDNS, No-IP, or FreeDNS offer free tiers that allow you to associate a fixed hostname (e.g., `myiotdevice.duckdns.org`) with your dynamic IP address. Your IoT device or router periodically updates the DDNS service with your current IP. * **VPN:** As discussed, a self-hosted VPN server provides a stable and secure way to access your home network regardless of IP changes. * **Reverse SSH Tunnels/Ngrok:** These create persistent tunnels to your device without needing dynamic DNS or port forwarding, but they rely on an external service. Ngrok has a free tier that is excellent for testing. 4. **Maintenance and Updates:** * Keeping the operating system, web server, and application code updated is crucial for security and performance. This requires manual effort and can be time-consuming. * **Solution:** Implement automated update scripts (with caution to avoid breaking changes), subscribe to security advisories for your chosen software, and regularly check for new versions. 5. **Learning Curve:** * Setting up `iot ssh web free` solutions requires a diverse skill set, including Linux command line, networking, web development (HTML, CSS, JavaScript), and potentially a backend programming language (Python, Node.js). * **Solution:** Start with simple projects, leverage online tutorials and documentation, and gradually build up your knowledge. The open-source community is a great resource for learning. By anticipating these challengesRelated Resources:


Detail Author:
- Name : Graciela Walter
- Username : xcormier
- Email : swaniawski.jamaal@koch.com
- Birthdate : 1977-11-23
- Address : 59539 Ottilie Lane New Dannie, WI 18939-1834
- Phone : 951-740-6798
- Company : Altenwerth, Reilly and Veum
- Job : ccc
- Bio : Laborum quisquam quam cumque aut. Ducimus porro explicabo at id. Fuga officiis ducimus eos itaque. Eos reiciendis delectus nihil consequuntur. At eum consequuntur aut facilis.
Socials
tiktok:
- url : https://tiktok.com/@vhintz
- username : vhintz
- bio : Et optio quam sed optio tempore pariatur quaerat.
- followers : 3667
- following : 1450
linkedin:
- url : https://linkedin.com/in/vivianne5092
- username : vivianne5092
- bio : Non quibusdam ex eius sequi totam sequi.
- followers : 3731
- following : 2441
